Create an insight trigger
Insight triggers help you to check your processes for certain aspects, for example, when activities exceed a certain throughput time. You can define insight triggers to check activities or cases for insights. When you check activities for insights, an insight is created for each activity in a case that meets an insight condition. When you check cases for insights, an insight is created for each case in which at least one activity meets the condition. For every case or activity that meets the specified condition of an insight trigger, a defined workflow can be triggered automatically. For example, you can select a generic webhook/endpoint or Process Governance as a tagret system, and you can trigger e-mail notifications to inform users about insights.
Notes
The number of e-mails per tenant per day is limited to 1000.
The number of e-mails per insight trigger run is limited to 100. All additional e-mails will be skipped for that run.
External applications that are triggered as target system must support an endpoint on port 443 with the HTTPS protocol.
Create an insight trigger.
If you do not have an insight trigger, you can click Create insight trigger on the Overview page. The Condition dialog of the Create insight trigger wizard opens.
If you have insight triggers, click Insight triggers to open the Insight triggers page. The page displays the available insight triggers, including considered cases, type, and current status.
Click Create. The Condition dialog of the Create insight trigger wizard opens.
Select whether you want to check cases or activities for insights.
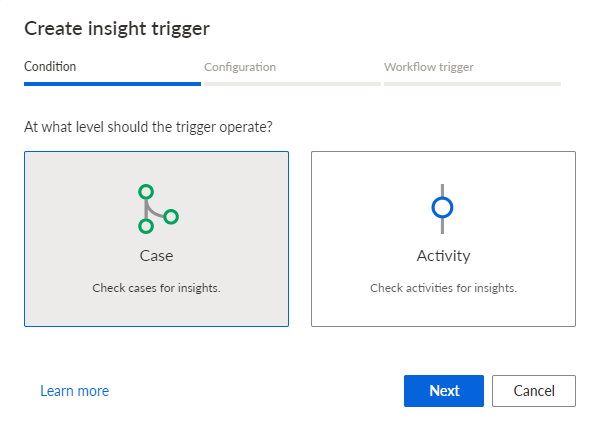
Click Next. The Configuration dialog opens.
Specify a name, a unique identifier, and an optional description for the insight trigger. By default, the specified name is set as the identifier.
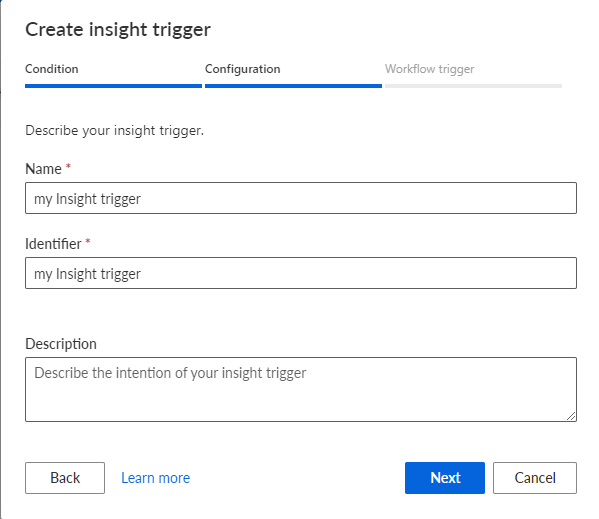
Click Next. The Workflow trigger dialog opens. Here you can configure the trigger action if the trigger condition is met.
If the trigger should not execute a workflow, enable the Skip action trigger (log mode only) option and click Create. The option is disabled by default. When the option is selected, a workflow is not triggered and only the captured insights are displayed.
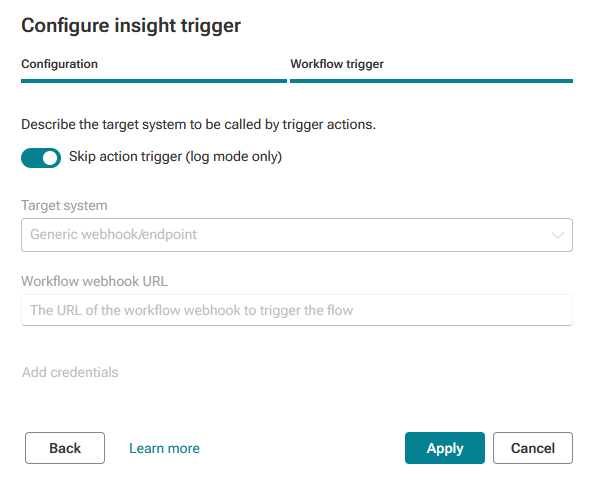
Select the workflow system to be triggered in the Target system drop-down menu. The web.Methods.io workflow system is selected by default.
Note that the target system must provide an endpoint with HTTPS protocol on port 443.
If you select Generic webhook/endpoint as a target system, configure the connection to the corresponding workflow system. Please ask your workflow system administrator for the required data.
Specify the workflow webhook URL. The URL is used to trigger the workflow defined in the workflow system.
If user credentials are required to log in to the workflow system, click Add credentials and specify a user name and password.
Example
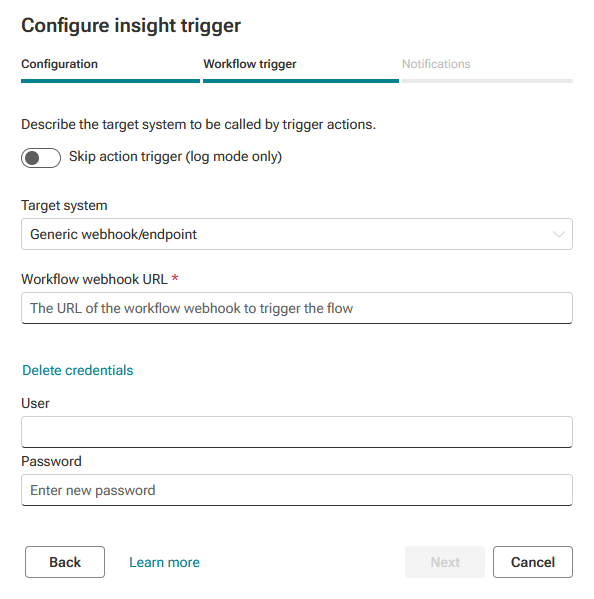
Click Next.
If you select E-mail notification as a target system, specify the recipients of the e-mail and configure the content of the notification.
In the Send to field enter the recipients of the e-mails. You can specify multiple user and user groups. Please note that users without a specified e-mail address are marked with a red dot. Click Customize e-mail notification to configure the notification layout and content in the Mail builder. You can also configure the e-mail notifications later.
Example
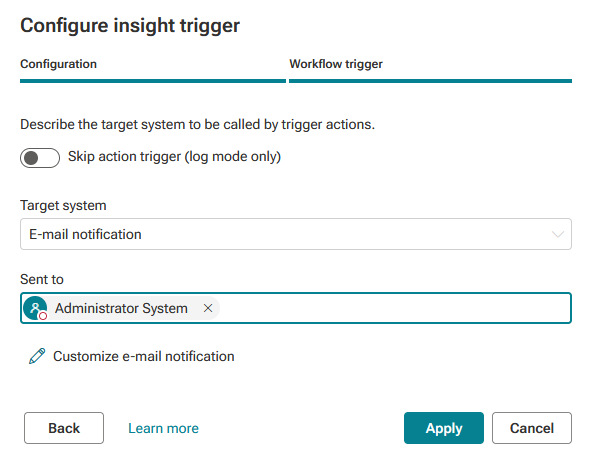
Click Apply.
If you select web.Methods.io as a target system, configure the connection to the web.Methods.io workflow system. Please ask your workflow system administrator for the required data.
Specify the workflow webhook URL. The URL is used to trigger the workflow defined in the workflow system.
If the workflow system does not require login credentials, enable None. The option is enabled by default.
If credentials are required to log in, enable the Tenant credentials option and specify a user name and password.
If a secret key is required, enable the Secret key option and enter a secret key.
Example
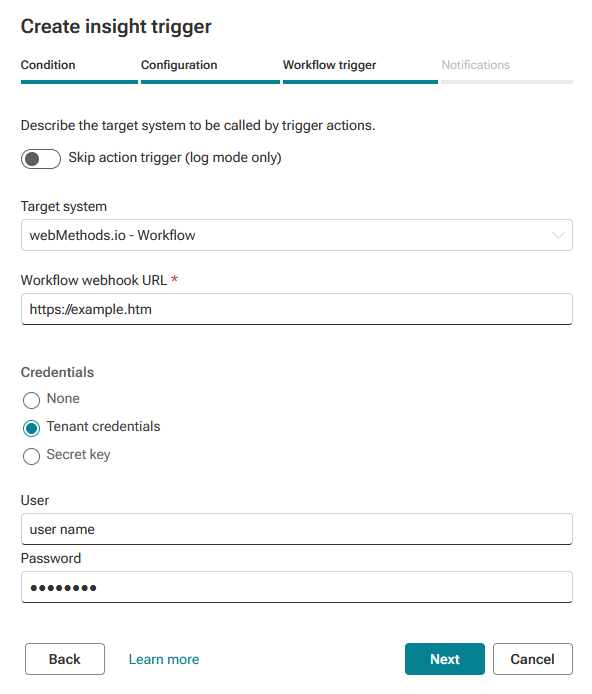
Click Next. The Notifications dialog opens. Here you can configure an e-mail notification in addition to the specified target system for the insight trigger you selected.
Enable the Enable e-mail action trigger option and enter the recipients of the e-mails in the Send to field. You can specify multiple user and user groups. Click Customize e-mail notification to configure the notification layout and content in the Mail builder. You can also configure the e-mail notifications later.
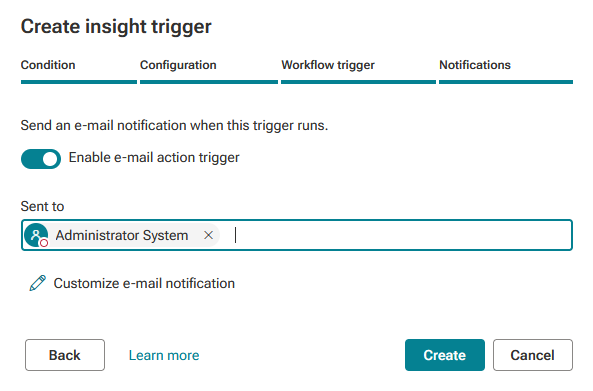
Click Create.
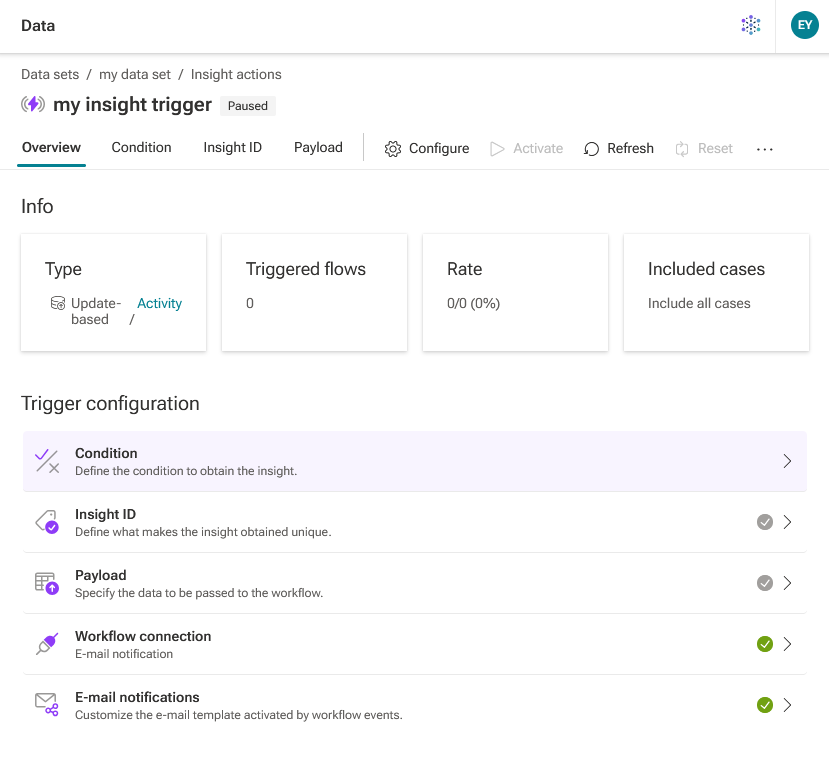
You have created an insight trigger. The Overview page of the created insight trigger opens.
To edit the insight trigger settings, open the Insight triggers page, select the insight trigger and click  Configure.
To delete the insight trigger, open the Insight triggers page, select the insight trigger and click  Delete.
Overview page of the insight trigger