Configure project filters
You can add one or more filters to a project to narrow down the cases you want to examine in that project.
A project filter is automatically applied to all analyses created for the project. By default, a project filter is hidden and locked in a project analysis. The project filter is hidden, that means the filter is displayed only in the Filters panel, but not in the header of an analysis. The project filter is locked, that means you cannot select the values for the project filter in an analysis. However, you can display a project filter and make the filter values selectable in a project analysis. For more details, see the Combining filters chapter.
Click
 Configure at the bottom of the Project panel.
Click
 Configure filter. The corresponding dialog opens.
Example
No filter has been created for the project yet.
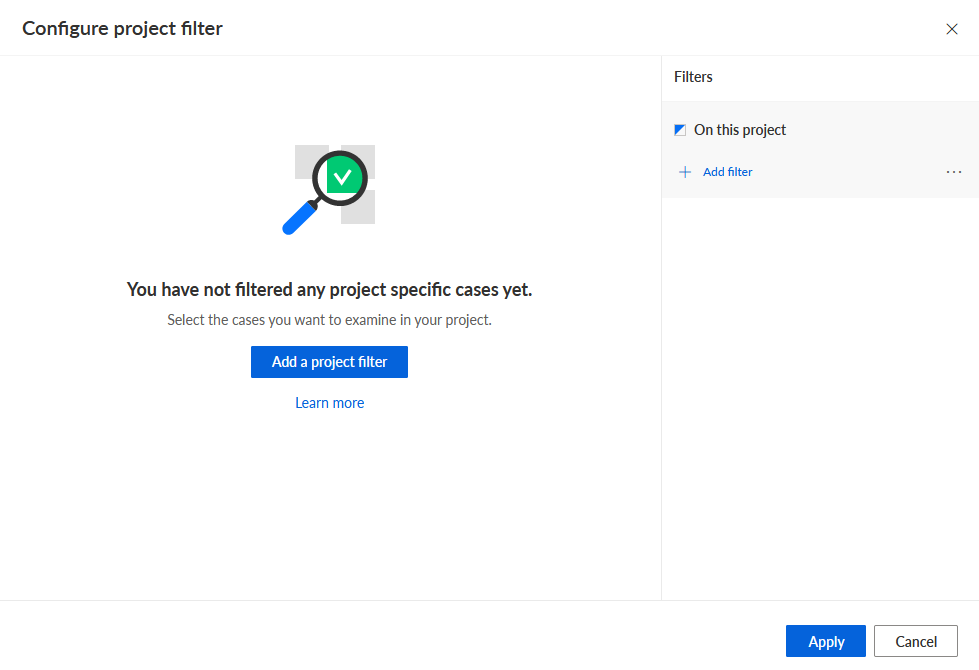
Click Add filter. The corresponding dialog opens.
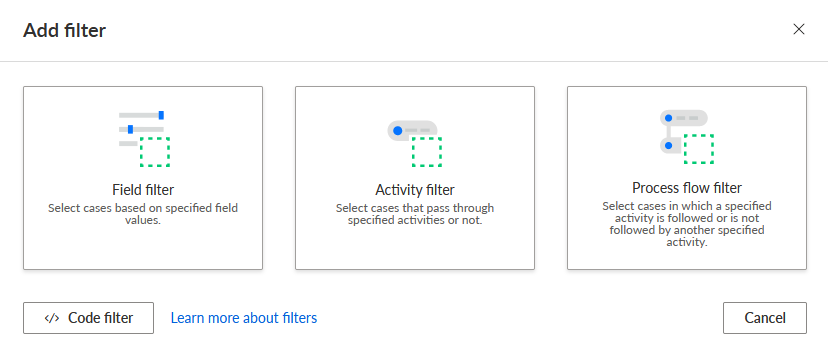
Select the filter method to specify a filter. A corresponding editor opens.
You created a project filter. The filter is added to the project filter list, which displays a preview of the filtered cases.
Example
The Risk category and Product category filters have been added to the project.
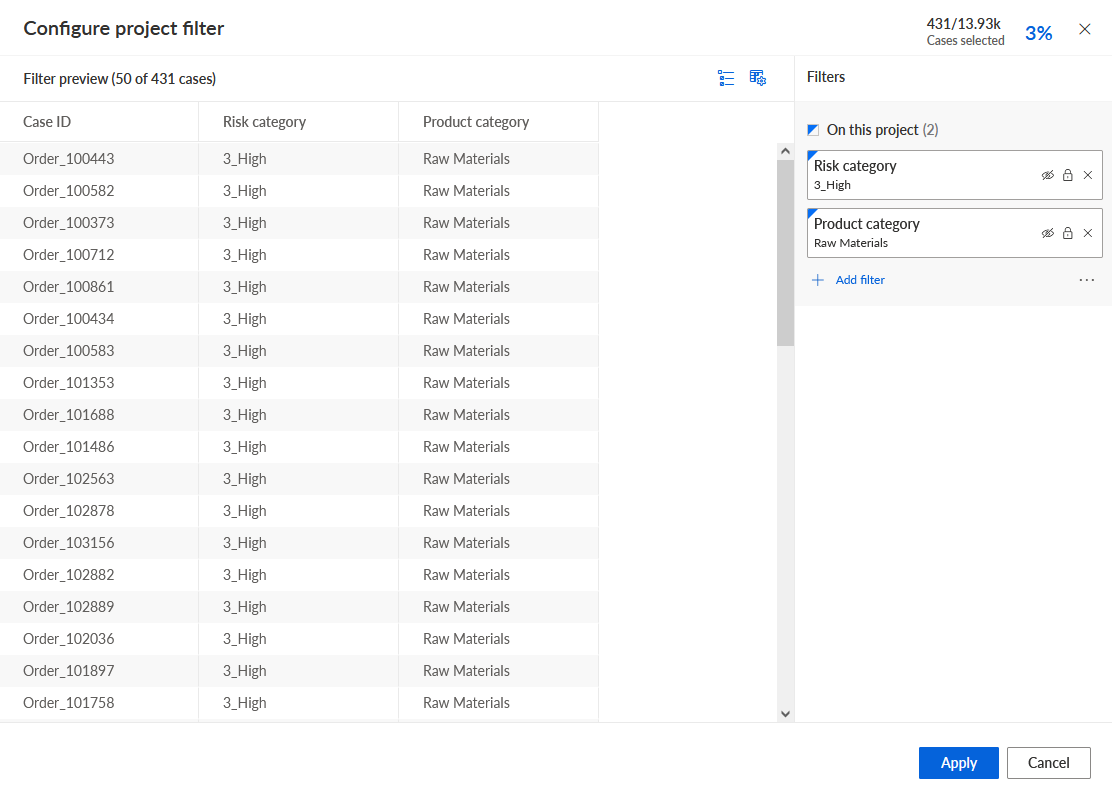
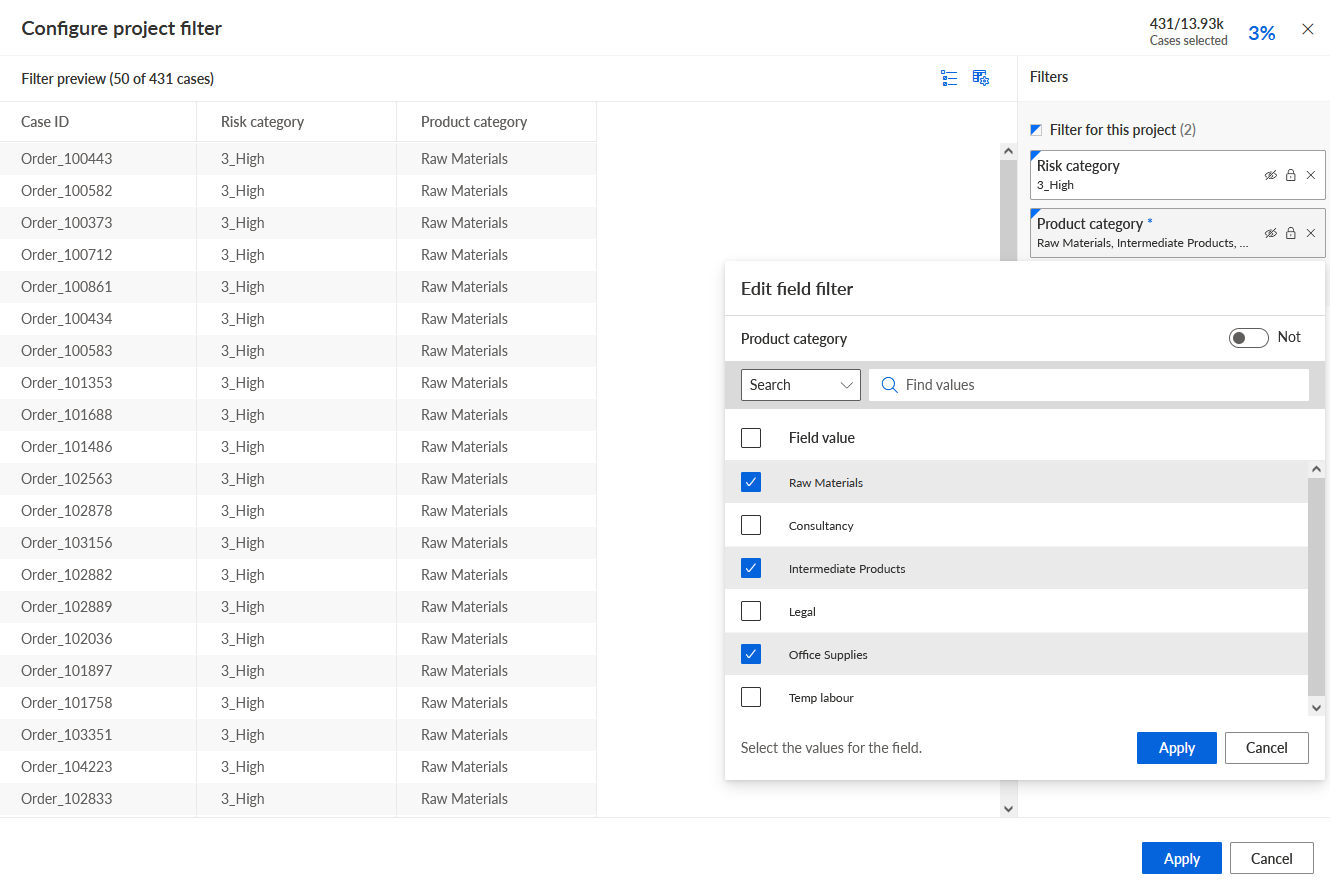
To edit the filter values, click a filter in the Filters panel, specify the values to filter and click Apply.
Example
To display a project filter in the child analysis, click the
 Hidden icon of the relevant filter in the Filters panel. The icon changes to
  Displayed. The project filter is displayed in the analysis header and the Filter panel.
To make the filter values selectable in the child analysis, click the
 Locked icon of the relevant filter in the Filters panel. The icon changes to
  Unlocked.
Click Apply.
You have configured filters for the selected project.
To remove a project filter, click the x Remove icon of the relevant filter in the Filters panel. To remove all filters, click the ... More options icon -> Clear all filters in the Filters panel.